Changing your motorcycle oil is a fundamental maintenance task that ensures optimal engine performance and longevity. While it may seem daunting for novice riders, the process is relatively straightforward with the right tools and knowledge. This comprehensive guide will walk you through the steps involved in changing your motorcycle oil, from gathering supplies to proper disposal of the old oil.
Gather Your Supplies
Before embarking on your oil change, ensure you have the following items:
- New motorcycle oil: Refer to your owner’s manual for the correct type and quantity.
- New oil filter: Check your owner’s manual for the correct filter.
- Oil filter wrench: This tool is often required to remove the oil filter.
- Drain pan: To collect the used oil.
- Socket wrench and appropriate socket: For removing the drain plug.
- New drain plug washer (if necessary): Check your owner’s manual.
- Funnel: For pouring the new oil.
- Rag or shop towels: For cleaning up spills.
- Gloves: To protect your hands from dirty oil.
Preparation
- Choose a suitable workspace: A garage or driveway is ideal.
- Park your motorcycle on a level surface: This ensures accurate oil level readings.
- Allow the engine to cool: To prevent burns and allow the oil to drain completely.
Draining the Old Oil
- Loosen the drain plug: Using your socket wrench, carefully loosen the drain plug but don’t remove it entirely.
- Position the drain pan: Place the drain pan directly beneath the drain plug to catch the used oil.
- Remove the drain plug: Carefully remove the drain plug and let the oil drain completely.
- Replace the drain plug washer (if necessary): Install a new drain plug washer if required according to your owner’s manual.
- Reinstall the drain plug: Tighten the drain plug securely, but avoid overtightening.
Replacing the Oil Filter
- Remove the old oil filter: Utilize the oil filter wrench to loosen and remove the old oil filter.
- Clean the filter mounting surface: Wipe the filter mounting surface clean with a rag to remove any debris.
- Lubricate the new oil filter gasket: Apply a thin coat of new oil to the gasket of the new oil filter to ensure a proper seal.
- Install the new oil filter: Hand-tighten the new oil filter until the gasket makes contact, then give it an additional 3/4 to 1 turn with the oil filter wrench. Avoid overtightening.
Adding New Oil
- Fill with new oil: Employ a funnel to slowly pour the recommended amount of new oil into the engine. Refer to your owner’s manual for the exact quantity.
- Check the oil level: Use the dipstick to verify the oil level. Add more oil if necessary, but avoid overfilling.
Starting the Engine
- Start the engine: Allow the engine to run for a few minutes to circulate the new oil.
- Check for leaks: Inspect the engine for any signs of oil leaks.
- Re-check oil level: Once the engine has cooled down, check the oil level again and add more oil if required.
Disposal of Used Oil
- Recycle your used oil: Many auto parts stores and recycling centers accept used oil for proper disposal.
- Properly dispose of the oil filter: Some auto parts stores will also recycle oil filters.
Tips for Successful Oil Changes
- Consult your owner’s manual: Always refer to your motorcycle’s owner’s manual for specific instructions and recommendations.
- Wear protective gear: Gloves, safety glasses, and old clothes are recommended to protect yourself from oil and dirt.
- Change the oil filter with every oil change: This is essential for maintaining engine cleanliness.
- Keep track of oil change intervals: Record the date and mileage of each oil change for future reference.
- Store used oil and filters safely: Avoid spills and leaks by storing them in appropriate containers.
The Importance of Choosing the Right Motorcycle Oil
Selecting the appropriate motorcycle oil is crucial for maintaining optimal engine health and performance. Different types of motorcycles have distinct oil requirements based on engine design, riding conditions, and manufacturer recommendations. Let’s delve into the world of motorcycle oils.
Types of Motorcycle Oil
- Mineral Oil: Derived directly from crude oil, mineral oil is more affordable and suitable for older motorcycles or those with lower performance demands. It offers basic engine protection.
- Synthetic Oil: Engineered in a laboratory, synthetic oil boasts superior performance, resisting heat, oxidation, and viscosity breakdown. It’s ideal for high-performance motorcycles and those subjected to extreme riding conditions.
- Semi-Synthetic Oil: A blend of mineral and synthetic oils, semi-synthetic oil offers a balance of performance and affordability, making it suitable for a wide range of motorcycles.
Oil Viscosity: What It Means
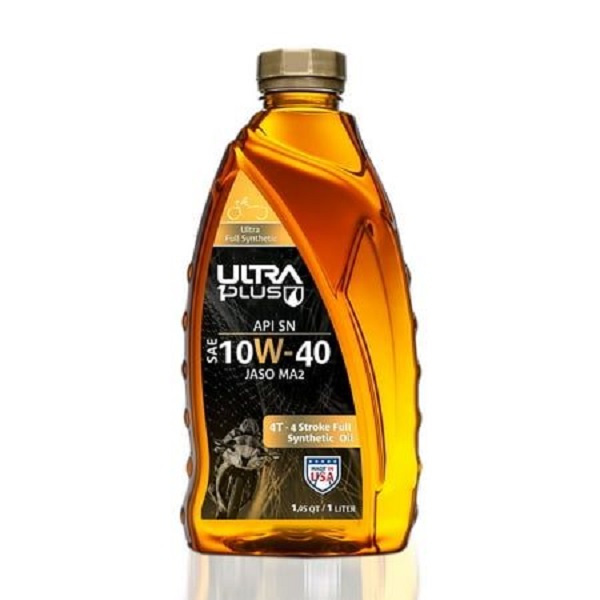
Oil viscosity refers to its thickness, represented by a number followed by a W (winter) and another number (e.g., 10W-40).
- The first number (10W) indicates the oil’s viscosity at cold temperatures.
- The second number (40) represents the oil’s viscosity at operating temperature.
The appropriate viscosity depends on your motorcycle’s engine, climate, and riding conditions. Always consult your owner’s manual for the recommended viscosity.
Oil Certifications and Standards
Various organizations certify motorcycle oils to ensure they meet specific quality and performance standards. Some common certifications include:
- API (American Petroleum Institute): Sets standards for engine oil performance.
- JASO (Japanese Automotive Standards Organization): Focuses on motorcycle-specific oil requirements, including clutch performance.
- OEM (Original Equipment Manufacturer) Specifications: Specific requirements set by motorcycle manufacturers.
How to Choose the Right Motorcycle Oil
- Consult Your Owner’s Manual: This is the most reliable source of information for your motorcycle’s oil requirements.
- Consider Your Riding Conditions: If you ride in extreme conditions (hot or cold temperatures), consider a synthetic oil with a wider viscosity range.
- Check for Oil Leaks: If you experience frequent oil leaks, using a thicker oil might help. However, consult a mechanic to diagnose the root cause of the leak.
- Balance Performance and Cost: Synthetic oils offer superior performance but come at a higher price. Mineral oil is more affordable but may not provide the same level of protection.
Common Motorcycle Oil Problems and How to Address Them
Understanding Common Oil-Related Issues
While regular oil changes are essential, various oil-related problems can arise. Let’s explore some common issues and how to address them.
Oil Consumption
Excessive oil consumption can be caused by several factors:
- Worn engine components: Excessive wear can lead to increased oil consumption.
- Incorrect oil type: Using the wrong oil viscosity or type can contribute to oil consumption.
- Valve seals: Worn valve seals can allow oil to seep into the combustion chamber.
If you notice excessive oil consumption, it’s crucial to consult a mechanic for diagnosis and repair.
Oil Leaks
Oil leaks can occur due to various reasons:
- Loose or damaged drain plug: Ensure the drain plug is tightened securely and replace the washer if necessary.
- Worn oil pan gasket: A damaged oil pan gasket can cause leaks.
- Cracked engine case: In severe cases, a cracked engine case may be the culprit.
Inspect your motorcycle for the source of the leak and address the issue accordingly. If you’re unable to pinpoint the leak, seek professional assistance.
Oil Sludge
Oil sludge is a thick, gummy substance that can form inside the engine due to:
- Prolonged oil change intervals: Neglecting oil changes allows contaminants to build up.
- Short trips: Frequent short trips prevent the engine from reaching optimal operating temperature, hindering oil circulation.
- Low-quality oil: Using inferior oil can contribute to sludge formation.
Regular oil changes, using high-quality oil, and avoiding excessive short trips can help prevent oil sludge.
Interpreting the Condition of Your Oil
Checking the condition of your oil is crucial for maintaining engine health. Here’s what to look for:
- Color: New oil is typically clear or slightly amber. Dark, black, or cloudy oil indicates contaminants and potential issues.
- Consistency: Oil should be fluid. Thick or gummy oil suggests sludge formation or other problems.
- Metal particles: The presence of metal particles in the oil indicates engine wear.
If you notice any abnormalities in your oil, it’s essential to investigate the cause and address it promptly.
Regularly changing your motorcycle oil is a vital part of motorcycle maintenance. By following these steps and taking the time to do it right, you can prolong your motorcycle’s life and ensure optimal performance.