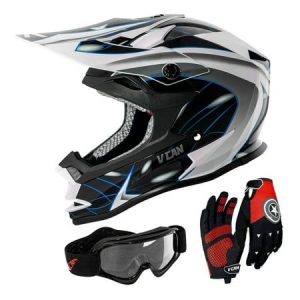
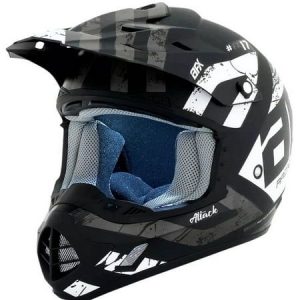
A motorcycle helmet visor is a crucial component, providing protection from wind, dust, debris, and insects while offering clear visibility for safe riding. However, visors can get scratched, worn, or damaged over time, necessitating replacement. Even if your visor isn’t damaged, you might need to adjust it for optimal comfort and functionality. This comprehensive guide explores the process of replacing and adjusting your motorcycle helmet visor, ensuring a clear and comfortable riding experience.
Safety First: Understanding the Importance of a Properly Maintained Visor
A scratched, foggy, or damaged visor can significantly hinder your vision while riding. Here’s why a properly maintained visor is essential for motorcycle safety:

- Clear Visibility: A clear, undamaged visor ensures optimal visibility on the road. Scratches and cloudiness can distort your vision, increasing the risk of accidents.
- Protection from Elements: The visor shields your eyes from wind, dust, rain, insects, and debris that could distract or injure you while riding.
- Impact Resistance: A high-quality visor offers some level of impact protection in case of a crash.
By replacing a damaged visor and keeping it clean and scratch-free, you prioritize your safety and ensure a clear view of the road ahead.
Knowing Your Visor: Types and Replacement Considerations
Motorcycle helmet visors come in various types, each with its own advantages and considerations when replacing:
- Standard Visor: The most common type, a standard visor is made of clear, scratch-resistant polycarbonate plastic.
- Tinted Visors: Tinted visors offer protection from sunlight and glare, suitable for bright conditions. However, they can reduce visibility at night or in low-light situations.
- Anti-Scratch Visors: These visors have a special coating that resists scratches and helps maintain clear visibility for longer.
- Anti-Fog Visor: Anti-fog visors have a special coating or insert that helps prevent fogging in humid or cold weather conditions.
When replacing your visor, consider your riding style, the climate in your riding area, and the features most important to you.
Here are some additional replacement considerations:

- Compatibility: Ensure the replacement visor is compatible with your specific helmet model. Visors are not universal, and using an incompatible visor can compromise safety and fit.
- Material and Thickness: Choose a visor made from high-quality, impact-resistant polycarbonate plastic. Consider a thicker visor if you prioritize scratch resistance.
- Aftermarket Options: While OEM (Original Equipment Manufacturer) visors are guaranteed to fit your helmet, aftermarket options can offer competitive prices and additional features like anti-scratch or anti-fog coatings.
By understanding the different visor types and considering these factors, you can choose the perfect replacement visor for your motorcycle helmet.
Ready, Set, Replace: A Step-by-Step Guide to Visor Replacement
Replacing your motorcycle helmet visor is a relatively simple process. Here’s a step-by-step guide to get you started:
- Gather Your Tools: You’ll typically need a Phillips head screwdriver or a flathead screwdriver (depending on your helmet model) and your replacement visor.
- Locate the Release Mechanism: Most visors have a release mechanism on either side of the helmet, near the visor hinge. Consult your owner’s manual for the specific location on your helmet.
- Release the Visor: Press or slide the release mechanism on each side of the helmet according to your visor type. The visor should come loose from the hinge.
- Remove the Old Visor: Once released, carefully remove the old visor from the helmet.
- Clean the Helmet Visor Well (Optional): If you’re reusing the existing visor, take this opportunity to clean it thoroughly with a mild soap solution and a microfiber cloth. Avoid using harsh chemicals or abrasive cleaners that could damage the visor.
- Install the New Visor: Line up the new visor with the hinge slots on the helmet.
- Secure the Visor: Press or slide the release mechanism on each side of the helmet back into place to secure the new visor. Ensure the visor is firmly attached and opens and closes smoothly.
Always consult your owner’s manual for specific instructions regarding visor removal and replacement for your particular helmet model.
Finding the Perfect Fit: Adjusting Your Motorcycle Helmet Visor
A properly adjusted visor ensures optimal comfort and functionality. Here’s how to adjust your motorcycle helmet visor for the best fit:

- Tension Adjustment: Many visors have a tension adjustment mechanism that allows you to control how tightly the visor closes. A looser tension might be preferable for easier opening and closing, while a tighter tension can help prevent wind noise and air leaks.
- Anti-Fog Pinlock Insert (if applicable): Some helmets utilize a Pinlock insert, a small, removable visor insert that helps prevent fogging. If your helmet has a Pinlock system, consult the manual for proper installation and adjustment instructions.
- Cleaning and Maintenance: Regular cleaning with a mild soap solution and a microfiber cloth keeps your visor clear and free of debris. Treat anti-scratch or anti-fog visors with appropriate cleaning products designed for those specific coatings.
By making these adjustments and maintaining your visor properly, you can ensure a comfortable and clear view while riding.
Beyond the Basics: Additional Tips for Optimal Visor Use
Here are some additional tips to get the most out of your motorcycle helmet visor:

- Carrying a Spare Visor: Consider keeping a spare visor in your motorcycle bag, especially on long rides. A sudden downpour or unexpected damage can significantly impact your visibility.
- Visor Cleaning on the Go: Investing in a small visor cleaning spray and a microfiber cloth allows you to clean minor dirt or grime from your visor during rides.
- Anti-Fog Sprays: While not a permanent solution, anti-fog sprays can be helpful in preventing fogging on the visor, especially in humid or cold weather.
By following these tips, you can ensure your visor remains a valuable asset for safe and enjoyable motorcycle riding.
The Importance of a High-Quality Visor
A high-quality visor is an investment in your safety and riding experience. By understanding the different visor types, considering replacement factors, and learning proper adjustment techniques, you can keep your visor functioning optimally. Remember, a clear view of the road is critical, so don’t neglect the importance of a properly maintained visor for every ride.

Upgrade Your Ride: Shop for High-Quality Visors Today!
Ready to experience the clarity and safety benefits of a high-quality visor? Numerous retailers offer a wide selection of motorcycle helmet visors to suit your needs and budget. Whether you’re looking for a standard replacement, a tinted visor for sunny days, or a visor with anti-scratch or anti-fog features, there’s a perfect option waiting for you.


