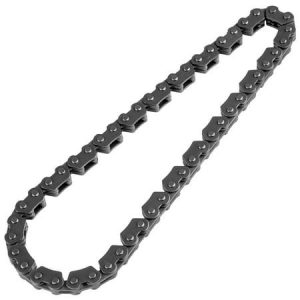
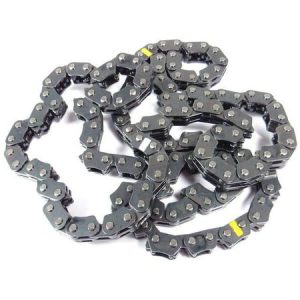
Keeping your motorcycle in top shape is essential for safe and enjoyable riding. One crucial aspect of maintenance involves ensuring your chain has the proper tension. A loose chain can cause jerky acceleration, imprecise handling, and premature wear on the chain and sprockets. Conversely, a chain that’s too tight can put undue stress on the drivetrain components and lead to decreased performance.
This guide equips you with the knowledge and steps to confidently tighten your motorcycle chain, ensuring a smooth and safe ride.
Understanding Chain Slack: The Goldilocks Zone
Imagine your motorcycle chain as a skipping rope. It shouldn’t be taut like a guitar string, but it also shouldn’t hang limp like a deflated balloon. The ideal tension lies somewhere in between – a sweet spot referred to as “chain slack.”

The acceptable range for chain slack varies depending on your motorcycle model. Consult your owner’s manual for the specific measurement recommended by the manufacturer. It’s typically specified in millimeters (mm) or inches (in) and can be checked by pushing the chain up and down midway between the front and rear sprockets.
Signs Your Chain Needs Adjustment
Here are some telltale signs that your motorcycle chain needs adjusting:
- Excessive chain slap: A loose chain will have noticeable up-and-down movement when you push it with your fingers. This slapping can also be heard while riding, especially at higher speeds.
- Jerky acceleration: When you apply throttle, the bike might lurch forward due to the slack in the chain taking up space before engaging the drive.
- Imprecise handling: A loose chain can affect your motorcycle’s handling, making it feel less responsive and stable during cornering or maneuvering.
- Visible wear on chain and sprockets: As the chain loosens, it puts increased stress on itself and the sprockets, leading to premature wear and potential damage.
Tools You’ll Need
Before diving into the adjustment process, gather the necessary tools:

- Motorcycle owner’s manual: This is your bible for everything motorcycle-related, including the specific chain slack measurement for your model.
- Stands: You’ll need a paddock stand (or two) to lift the rear wheel off the ground for proper chain access and adjustment. Alternatively, a friend can assist by holding the motorcycle upright while you adjust the chain.
- Wrenches: Depending on your motorcycle, you’ll likely need wrenches of various sizes to loosen and tighten the axle nut and chain adjusters.
- Chain lube: After adjusting the chain, it’s a good practice to lubricate it properly to minimize friction and wear.
Steps to Tightening Your Motorcycle Chain (Make & Model Specific Variations Apply)
1. Prepare Your Motorcycle
- Consult your owner’s manual for the recommended chain slack specification for your motorcycle model.
- Park your motorcycle on a level surface and engage the parking brake.
- If using a paddock stand, lift the rear wheel off the ground until the swingarm is parallel to the ground.
2. Loosen the Axle Nut
- Locate the rear axle nut on the right side of the swingarm.
- Use the appropriate wrench to loosen the nut by a few turns. Don’t completely remove it yet.

3. Identify the Chain Adjusters
- On most motorcycles, chain adjusters are located on either side of the rear axle. These are typically bolts with locknuts.
4. Adjust the Chain Tension
- Using the wrench, turn the chain adjusters in small increments (usually quarter-turns) on each side equally to tighten the chain.
- After each adjustment, push the chain up and down to measure the slack. Refer to your owner’s manual for the correct measurement.
- Continue making small adjustments until the chain reaches the specified slack.
5. Tighten the Axle Nut and Locknut
- Once the chain tension is correct, re-tighten the axle nut to the torque specification listed in your owner’s manual. This is crucial for proper wheel alignment and safety.
- Tighten the locknut for the chain adjusters on both sides.
6. Re-check Chain Slack and Alignment
- After tightening the axle nut and locknuts, re-check the chain slack to ensure it hasn’t changed.
- Spin the rear wheel by hand and visually inspect for any uneven chain movement or misalignment with the sprockets. If the chain appears misaligned, consult your owner’s manual or a qualified mechanic for assistance.
7. Lubricate the Chain
- With the chain adjustment complete, apply a chain lubricant following the manufacturer’s instructions. This reduces friction and protects the chain from wear and tear.
- Wipe off any excess lubricant to prevent dirt and debris buildup.
Additional Tips and Considerations
While the core steps for tightening a motorcycle chain remain consistent across most models, here are some additional tips and considerations to keep in mind:

- Consult a Mechanic if Unsure: If you’re unfamiliar with your motorcycle’s specific chain adjustment process or feel uncomfortable performing the task yourself, don’t hesitate to consult a qualified motorcycle mechanic. They have the expertise and tools to ensure your chain is adjusted correctly and safely.
- Frequency of Adjustment: Chain slack can change over time due to chain wear and sprocket wear. It’s recommended to check your chain tension regularly, typically every 200-300 miles (320-480 kilometers) or as specified in your owner’s manual.
- Chain Maintenance: Proper chain maintenance goes beyond just adjusting the tension. Regularly cleaning and lubricating your chain extends its lifespan and reduces wear on the sprockets.
Chain Replacement: Knowing When It’s Time
As you check your chain tension, you might also notice signs indicating the chain itself needs replacing. Here are some key indicators:
- Stiff links: If the chain feels stiff or has difficulty moving freely through its range of motion, it might be due to excessive wear or rust.
- Visible damage: Look for any visible cracks, nicks, or excessive wear on the chain links. These indicate potential safety hazards and warrant a chain replacement.
- Exceeding recommended wear limit: Most chain manufacturers specify a wear limit for their chains, often measured in percentage of elongation. Refer to the chain manufacturer’s recommendations to determine if your chain has reached its replacement point.
Replacing a motorcycle chain can be a more involved process compared to adjusting the tension. While some riders might be comfortable tackling this task themselves, it’s often recommended to have a qualified mechanic replace the chain, especially if it involves specialized tools or master link removal.
Invest in Your Ride – Essential Chain Maintenance Tools
Now that you’re equipped with the knowledge to tighten your motorcycle chain, consider investing in a few essential tools to streamline the process and ensure proper maintenance:

- Paddock stand: A paddock stand (or two) allows you to easily lift the rear wheel off the ground for chain access and adjustment. This not only simplifies the task but also promotes safety.
- Chain adjustment tool: While some motorcycles utilize wrenches for chain adjustment, a dedicated chain adjustment tool can make the process quicker and more efficient. These tools often feature markings to help you achieve the correct chain slack.
- Chain cleaning kit: Regular chain cleaning removes dirt, grime, and old lubricant, preventing premature wear and allowing fresh lubricant to adhere effectively. A chain cleaning kit typically includes a chain cleaner, brushes, and a degreaser.
- Chain lubricant: Investing in a high-quality chain lubricant specifically formulated for motorcycles is crucial. Regular lubrication minimizes friction, protects the chain from corrosion, and extends its lifespan.
By having these tools readily available, you’ll be prepared to maintain your motorcycle chain properly, ensuring a smooth and safe ride for miles to come.


